
How to generate the show tech log file
show tech-support command. It's executed in the enable mode (Privileged
EXEC Mode). The command displays diagnosis information for technical support by
is quite long. And don't worry if there are longer interrupts during the execution.
That is normal. To manage this output better you can redirect the output to a file.
In the following samples we will show you how to do it. The red marked fields in
chapter 2.1 and 2.2 may differ from the data to connect to your device and do need
to be replaced.
1. Required data to connect to your switch or router:
- Connection protocol that should be used: telnet, ssh or serial
- For telnet or ssh connections the IP address or hostname plus the used port number (If a non standard port is used). For serial connections the Serial Interface plus the transfer speed (If different from 9600)
- User name (Normally it is root or cisco)
- User password (Is normally different from the default: cisco)
- Password for enable mode (Normally it's the same as the user password)
2. Samples:
From which system you want to generate the show tech file?
Click the fitting link to jump directly to the right chapter:
Windows - Using Telnet (CLI)
Windows - Using Serial, Telnet or SSH (Putty)
Linux/Unix/OSX - Using Serial
Linux/Unix/OSX - Using Telnet
Linux/Unix/OSX - Using SSH
Directly from Switch or Router (Experts)
2.1 Generate the show tech file from a Windows system:
Normally there is no ssh client installed on a Windows system. Sometimes even no
telnet client. In this case you will need to install client software e.g. the free Putty client
as it is used in chapter 2.1.2.
2.1.1. Windows - Using Telnet (CLI)
For the case that your Windows system has got the CLI telnet client installed,
start a command window: Start -> Run -> "cmd" -> OK
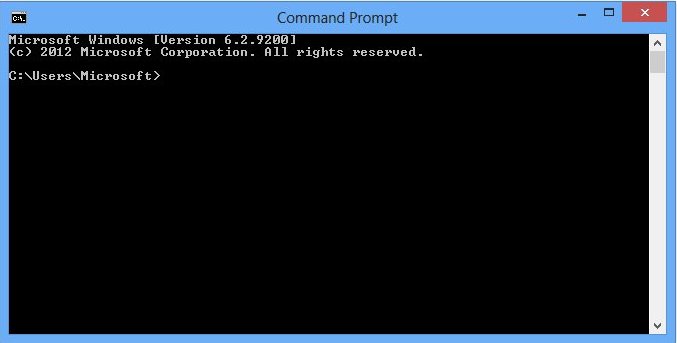
telnet 192.168.1.1 23 -f C:\Temp\sh-tech.txt
switch1# exit
Hint: Not using the default telnet port 23 requires to change the port number that is located behind the telnet ip address/hostname.
The generated file C:\Temp\sh-tech.txt, located on your computer, can be uploaded now to the analyzer.
2.1.2. Windows - Using Serial, Telnet or SSH (Putty):
With the free software Putty first configure the logging:
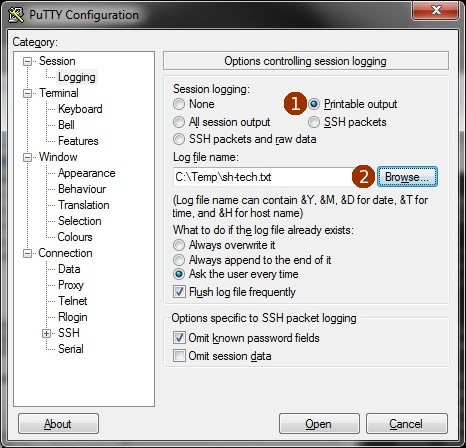
Then set the IP address and the connection type (Telnet, SSH or Serial).

Hint: Not using the default telnet port 23 or the default ssh port 22 requires to change the port number. You can find it next to the Host Name (or IP address).
After clicking the Open button the console window will open:
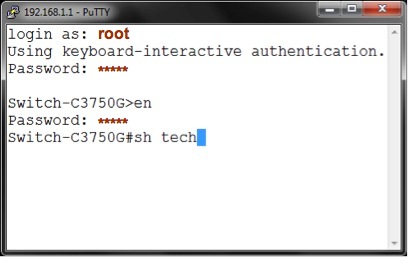
After the sh tech output finished the console window can be closed.
The generated file C:\Temp\sh-tech.txt, located on your computer, can be uploaded now to the analyzer.
2.2. Generate the show tech file from a Linux/Unix/OSX system
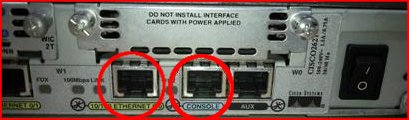
2.2.1. Linux/Unix/OSX Using Serial Interface (Console cable):
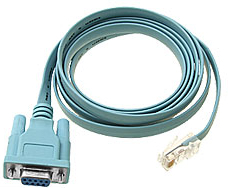 Usually a RJ45 Cisco rollover cable is used.
imac:~ user$ script /tmp/sh-tech.txt
imac:~ user$ screen /dev/ttyS0 9600
Switch-C3750G# exit
imac:~ user$ exit
The generated file /tmp/sh-tech.txt, located on your computer, can be uploaded now to the analyzer.
imac:~ shCHECK$ script /tmp/sh-tech.txt
imac:~ shCHECK$ telnet 192.168.1.1 23
Switch-C3750G# exit
Hint: Not using the default telnet port 23 requires to change the port number that is located behind the telnet ip address/hostname.
The generated file /tmp/sh-tech.txt, located on your computer, can be uploaded now to the analyzer.
2.2.3. Linux/Unix/OSX - Using SSH:
imac:~ user$ script /tmp/sh-tech.txt
Switch-C3750G# exit
imac:~ user$
Hint: Not using the default ssh port 22 requires to change the port number
that is located after the port option -p.
2.3. Directly generate the show tech file from the switch or router (Experts)
To write the sh tech output directly to a TFTP server with enabled file create option
and write permissions you could use the following switch/router command:
sh tech | redirect tftp://<TFTP Server IP>/sh-tech.txt
To write it to an FTP server:
sh tech | redirect ftp://<FTP Server IP>/sh-tech.txt
To be able to upload the file to the analyzer it must be transfered to your system before.
3. Transfer the sh tech file:
Most popular tools to transfer the sh tech file from a different server to your system are:
3.1. Linux/Unix/OSX - scp (CLI)
Command Syntax: scp [[user@]host1:]/path/file1 [[user@]host2:]/path/file2
Sample:
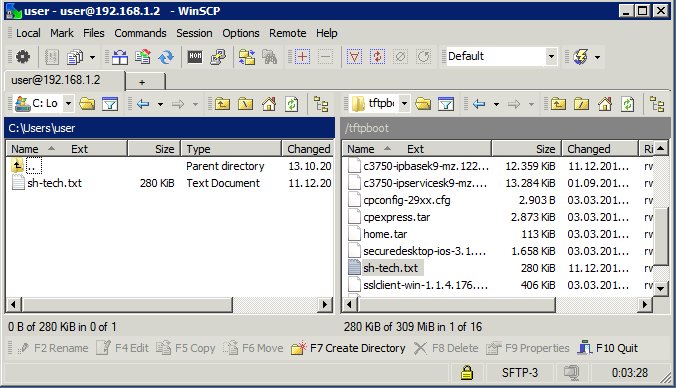
3.2. Windows - winscp
Download Link: winscp
Sample: The selected file will be moved from the remote system to your server
by mouse.
Secure transfer protocols:
SFTP = SSH + SFTP-server on server
SCP  = SSH + `scp` on server side
FISH = SSH + `dd` (and some other basic Unix utilities on the server side only)
Linux - SSH file transfer software:
- Filezilla (SFTP)
- Midnight Commander (FISH, Norton Commander Clone)
- Nautilus (Gnome): sftp://username@server/dir or File -> Connect to Server -> Service type "SSH". In Debian and Ubuntu a SSH client must be installed before the Nautilus SFTP feature will function with the command: sudo apt-get install ssh
- Konqueror (KDE): sftp://username@server/dir
- SecPanel GUI for SCP
- winscp via wine (SCP)
4. File Uploads
Supported analyzer formats for the file upload are:
text/*, .7z, .bz2, .gz, .rar, .tar, .tar.bz, .tar.gz, .tar.xz, .tbz, .tbz2, .tgz, .txt, .txz, .z, .zip
Hint: It is recommended to compress big show tech files to speed up the file upload.